How To Implement Adwords Conversion Tracker Using Google Tag Manager
- byFaisal Ahmed
- 1.4 k Views
In this article, I will guide you on how to implement a Google Adwords Conversion Tracker using Google Tag Manager. Please follow the steps below.
Step 1: Login to your Google Adwords account
Step 2: Click on the Tools from the top menu and select Conversions as shown below

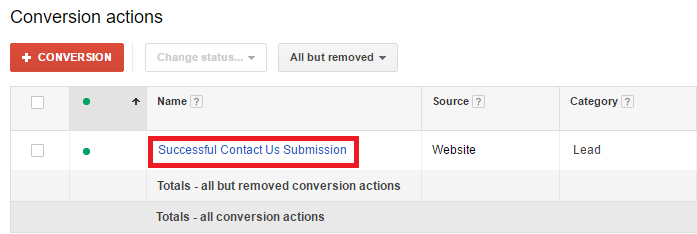
Step 3: On the Conversions, page Click on the conversion name “Successful Contact Us Submission” which we created previously as per How To Create An Adwords Conversion For A Website blog
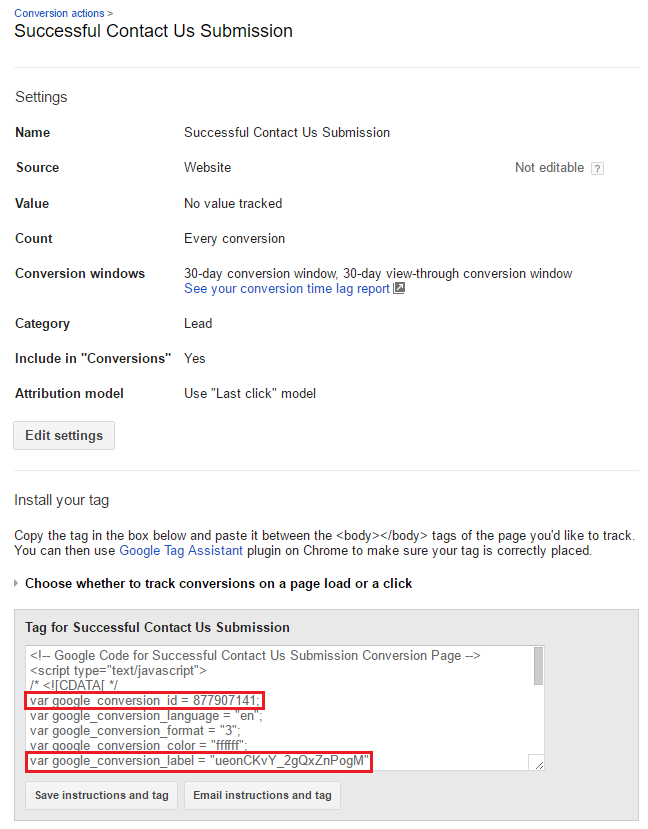
Step 4: From the next page Copy the Conversion ID and Conversion Label from the tracking code snippet as shown below
Step 5: Log in to your Google Tag Manager account. Click on your website’s container name as shown below

Step 6: In Google Tag Manager, first of all, we need to Create a Trigger which we will fire on certain user actions. In our scenario, we would like to fire this tag when a user will Submit a Contact Us page & will reach on a ThankYou page. Lets Click on the Triggers menu from left in-order to create Trigger
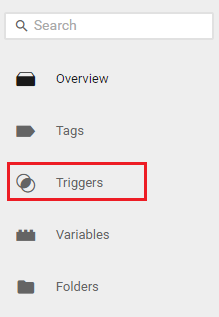
Step 7: From Triggers page Click on New button as shown in below picture.

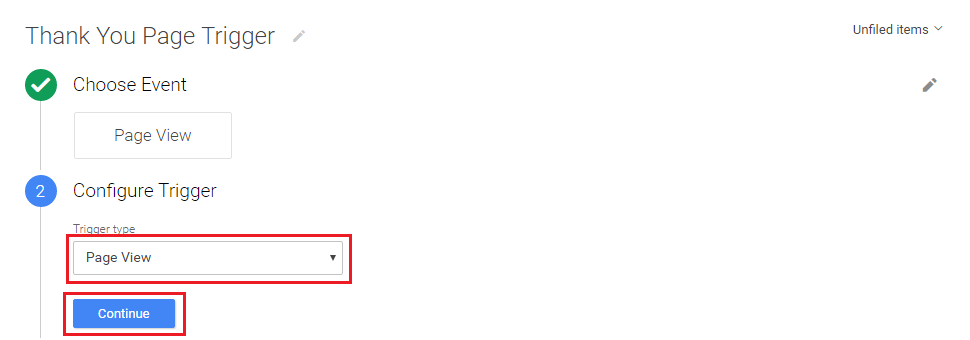
Step 8: Give a Name to your Trigger and select Page View from Events and then click on Continue button

Step 9: Select Trigger type as Page View from Configure Trigger option and click on Continue
Step 10: From Fire On option Select “Some Page Views” as shown below
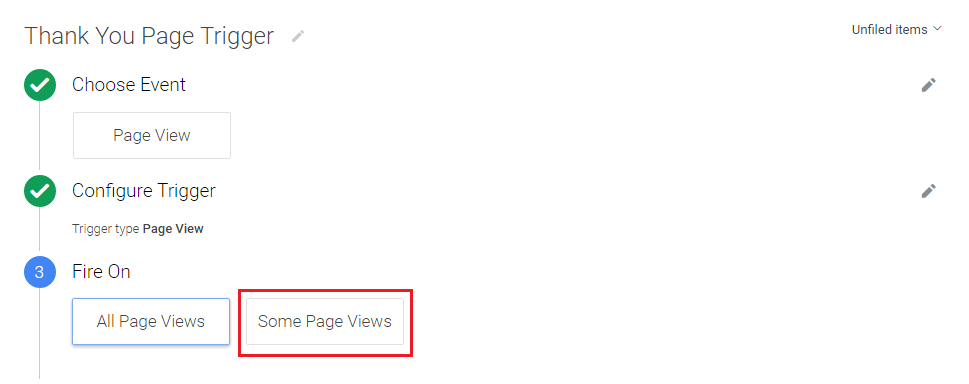
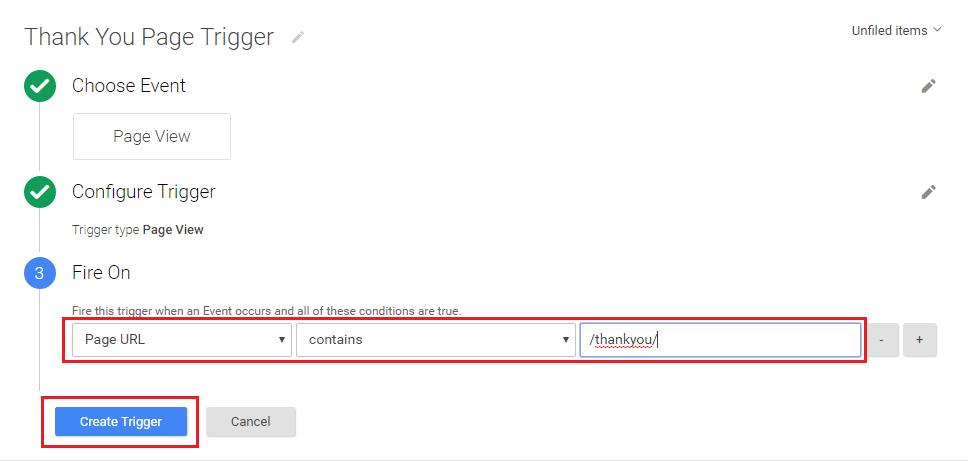
Step 11: After selecting “Some Page Views” from the Fire On option, now you need to provide ThankYou page URL as a condition that will be loaded after successful transactions or submitting a successful inquiry. In my scenario, this ThankYou page URL is simply /thankyou/. After putting all the details please click on Create Trigger button.For a complete view please review the below screenshot
Step 12: After creating trigger successfully, now you need to click on Tags in the left menu and select New as shown below

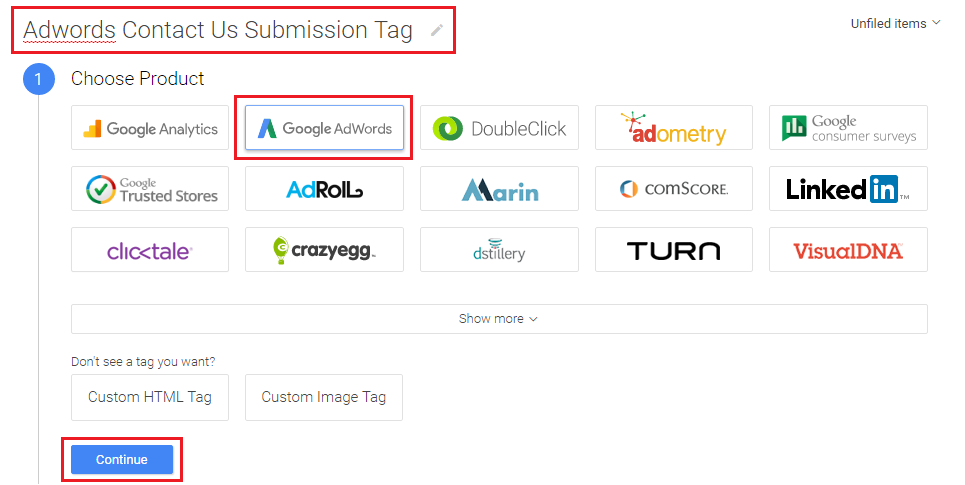
Step 13: Give a name to your new tag then select Google Adwords from the Choose Product option and Click on Continue button as shown below
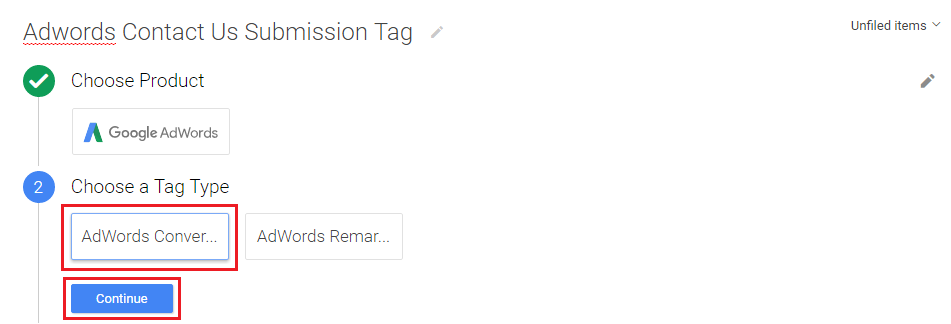
Step 14: Select Adwords Conversion from the Tag Type option and click on Continue
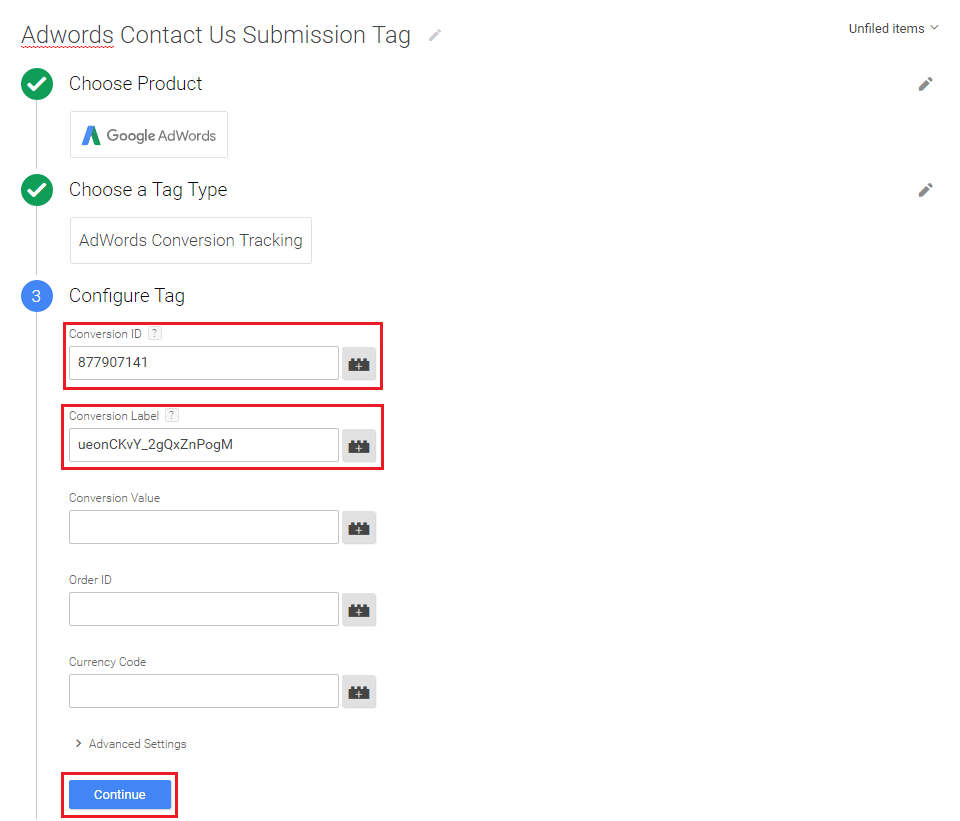
Step 15: Now paste the Conversion ID and Conversion Label which you have copied in “Step 4” of this article in the relevant fields. Leave all other values as blank as we are not creating an e-commerce tag but a simple web form submission. Perhaps if you are creating an e-commerce tag then feel free to enter the currency & the sale value then click on Continue button
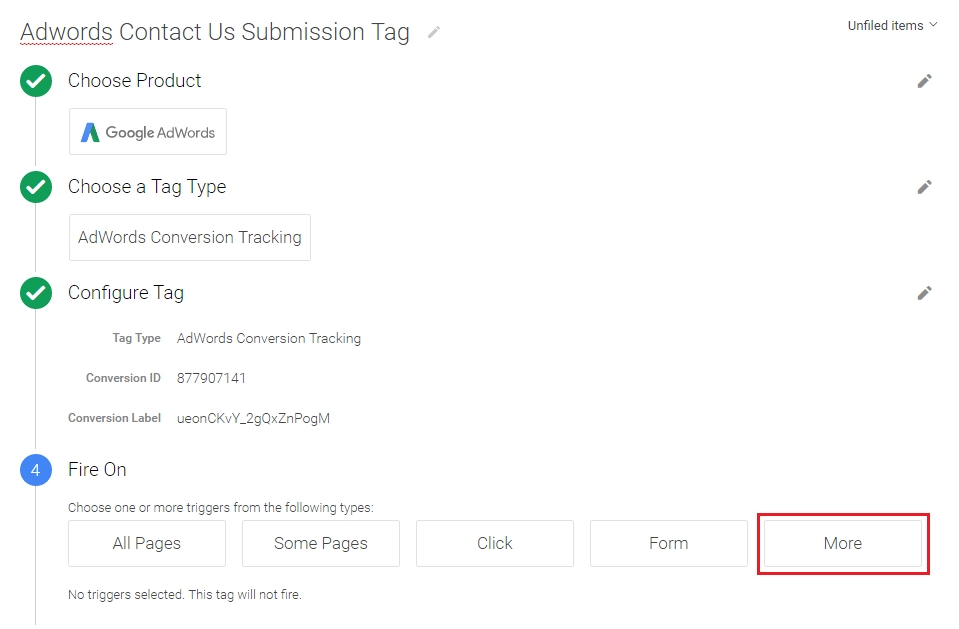
Step 16: From the Fire On options Click on More button and select the trigger you created previously and click on Save as shown below

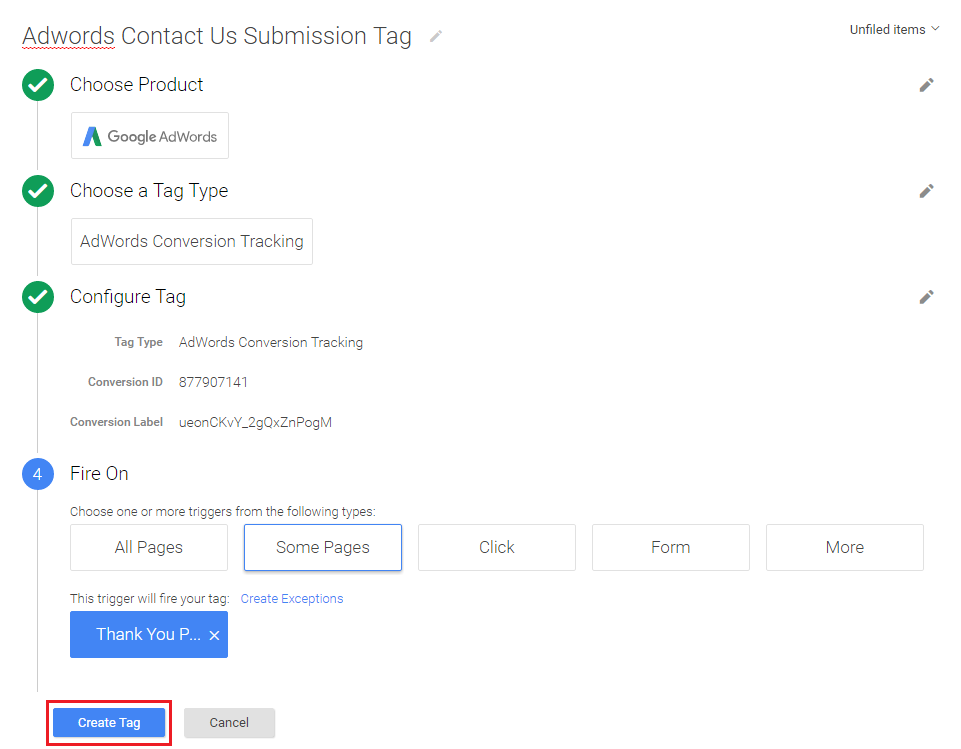
Step 17: Finally click on Create Tag button as shown below
Before publishing your changes test your tag by putting Google Tag Manager in preview mode to make sure your tag is getting fired properly.
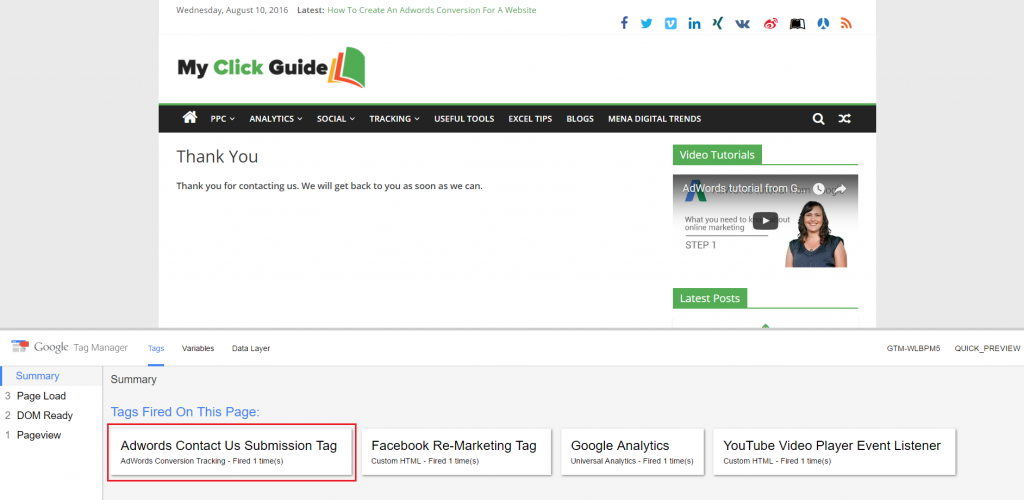
As you can see above the tag is getting fired properly. Now you can publish the changes made in Google Tag Manager by hitting the Publish button in Tag Manager.
Congratulations!! You have implemented your Google Adwords Conversion Tag Successfully.
Feel free to comment if you have any question regarding this article.
Faisal Ahmed
Every brand has stories to tell - stories that will not only engage, inform, surprise, delight, and impact their audience, but that will also deliver on measurable business goals. My job is to turn these brand stories into profitability by measuring action insights & user behaviors.